Rassbery PIにつけたタッチスクリーンのキャリブレーションをする
Rassbery PI Zero Wにタッチスクリーンを付けました.
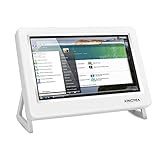
買ったのはこのKINCREAの7インチスクリーンです.
HDMIで画面が光り,USBでタッチスクリーンが動きます,
ただ,タッチスクリーンの左端の少しだけが反応しませんでした.
直すために,補正の設定が必要になります.
キャリブレーションの方法
ドライバのevdev,キャリブレーション用のアプリxinput_calibratorを入れる.
$ sudo apt install -y xserver-xorg-input-evdev xinput_calibrator
xinput_calibratorを起動して,calibにキャリブレーション情報を保存する
$ DISPLAY=:0 xinput_calibrator --misclick 0 > calib
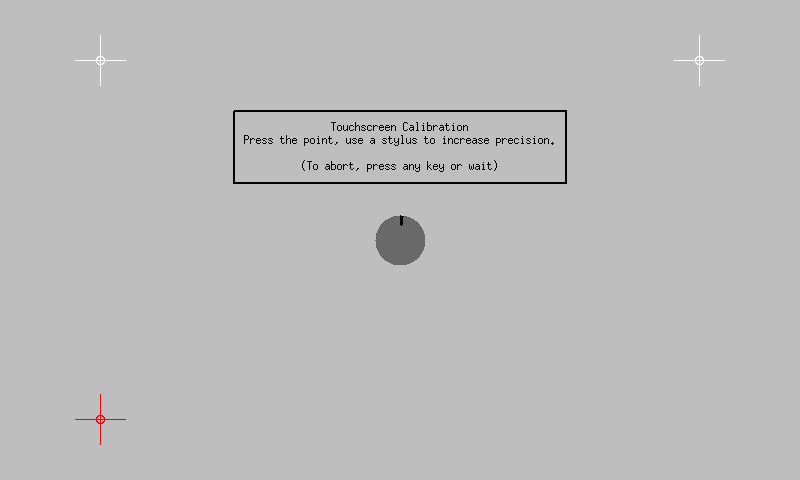
十字をタッチします.
画面の左側が反応しないので,左の十字は右よりでタッチします.

calibの情報をもとに, /usr/share/X11/xorg.conf.d/99-calibration.confにキャリブレーション情報を書き込む.
$ cat calib
Calibrating EVDEV driver for "wch.cn USB2IIC_CTP_CONTROL" id=6
    current calibration values (from XInput): min_x=181, max_x=4009 and min_y=59, max_y=4000

Doing dynamic recalibration:
    Setting calibration data: 267, 3933, 49, 3833
    --> Making the calibration permanent <--
  copy the snippet below into '/etc/X11/xorg.conf.d/99-calibration.conf' (/usr/share/X11/xorg.conf.d/ in some distro's)
Section "InputClass"
  Identifier  "calibration"
  MatchProduct    "wch.cn USB2IIC_CTP_CONTROL"
  Option  "Calibration" "267 3933 49 3833"
  Option  "SwapAxes"    "0"
EndSection
$ sudo vi -p /usr/share/X11/xorg.conf.d/99-calibration.conf  calib
/usr/share/X11/xorg.conf.d/99-calibration.confの内容
Section "InputClass"
        Identifier      "calibration"
        MatchProduct    "wch.cn USB2IIC_CTP_CONTROL"
        Driver "evdev"
        Option  "Calibration"   "260 3933 49 3870"
EndSection
Driver "evdev"は明示的に必要でした.
Option "Calibration" "260 3933 49 3870"は"x-min x-max y-min ymax".
手で数値をいじるときは,ポインタがはみ出すなら値の区間を広くすれば良いです.
最後に再起動しましょう.
$ sudo reboot
xinput_calibratorの内容はドライバの設定によって変化します.
うまく行かない場合は99-calibration.confの設定を書き換えて再起動を試してください
xorgの挙動を調べる
xinput listでデバイスネームやidを調べられます.
pi@raspberrypi:~ $ DISPLAY=:0 xinput list
⎡ Virtual core pointer                        id=2    [master pointer  (3)]
⎜   ↳ Virtual core XTEST pointer                id=4    [slave  pointer  (2)]
⎜   ↳ wch.cn USB2IIC_CTP_CONTROL                id=6    [slave  pointer  (2)]
⎜   ↳ Logitech USB Optical Mouse                id=7    [slave  pointer  (2)]
⎣ Virtual core keyboard                       id=3    [master keyboard (2)]
    ↳ Virtual core XTEST keyboard                 id=5    [slave  keyboard (3)]
xinput list-propsで設定されているプロパティを確認できます.
ここに値がなければ正しく設定されていません.
pi@raspberrypi:~ $ DISPLAY=:0 xinput list-props 6
Device 'wch.cn USB2IIC_CTP_CONTROL':
    Device Enabled (114):   1
    Coordinate Transformation Matrix (115): 1.000000, 0.000000, 0.000000, 0.000000, 1.000000, 0.000000, 0.000000, 0.000000, 1.000000
    Device Accel Profile (240): 0
    Device Accel Constant Deceleration (241):   1.000000
    Device Accel Adaptive Deceleration (242):   1.000000
    Device Accel Velocity Scaling (243):    10.000000
    Device Product ID (244):    6790, 58851
    Device Node (245):  "/dev/input/event1"
    Evdev Axis Inversion (246): 0, 0
    Evdev Axis Calibration (247):   260, 3933, 49, 3870
    Evdev Axes Swap (248):  0
    Axis Labels (249):  "Abs MT Position X" (238), "Abs MT Position Y" (239), "Abs MT Touch Major" (237), "None" (0), "None" (0)
    Button Labels (250):    "Button Unknown" (234), "Button Unknown" (234), "Button Unknown" (234), "Button Wheel Up" (120), "Button Wheel Down" (121)
    Evdev Scrolling Distance (251): 0, 0, 0
    Evdev Middle Button Emulation (252):    0
    Evdev Middle Button Timeout (253):  50
    Evdev Middle Button Button (254):   2
    Evdev Third Button Emulation (255): 1
    Evdev Third Button Emulation Timeout (256): 750
    Evdev Third Button Emulation Button (257):  3
    Evdev Third Button Emulation Threshold (258):   1000
    Evdev Wheel Emulation (259):    0
    Evdev Wheel Emulation Axes (260):   0, 0, 4, 5
    Evdev Wheel Emulation Inertia (261):    10
    Evdev Wheel Emulation Timeout (262):    200
    Evdev Wheel Emulation Button (263): 4
    Evdev Drag Lock Buttons (264):  0
evdevの設定名は man evdev で確認できます.
list-propsで表示されているプロパティ名とxorgsのconfの設定名は異なります.
気をつけましょう.
長押し右クリックはうまくいかない
evdevで長押ししたときの挙動を右クリックにできるようなのですが,うまくいきませんでした.謎.
この設定で動くと思うんだけどな
        Option  "EmulateThirdButton"            "1"
        Option  "EmulateThirdButtonTimeout"     "750"
        Option  "EmulateThirdButtonMoveThreshold"   "30"
タッチスクリーンのセットアップ
買ったタッチスクリーンは次の3口を持っています.
Raspi Zero Hは次の3口を持っています
- miniHDMI
- USB type B micro 内側 デバイス用
- USB type B micro 外側 給電のみ
買ったタッチスクリーンには次のものが付属しました.
これはタッチスクリーンがRaspiB用のためだからです. なので,Zeroを接続するために追加で必要なものは次の2つです.

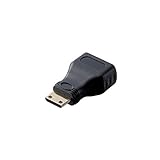
エレコム 変換アダプタ HDMI(タイプA)メス-HDMI mini(タイプC)オス ブラック AD-HDAC3BK
- 発売日: 2015/06/19
- メディア: Personal Computers
typeB micro <-> typeA

iBUFFALO USB(microB to A)変換アダプター ブラック BSMPC11C01BK
- 発売日: 2011/11/01
- メディア: エレクトロニクス
これらと,給電用のUSBケーブル+AC/DCが必要です.
3本のケーブルで動作しました.
- HDMIケーブルををスクリーンにつなぎ,HDMIを変換してHDMI microにしてRaspiにつなぐ
- 給電typeB microケーブルをスクリーンの内側に刺す
- もう1本のUSBケーブルをスクリーンと,typeB micro変換してraspiの内側につなぐ (同時にraspiに給電される)
感想
変換器にお金が必要なので,それならば,もともと対応していたraspiのBを買えばよかったなと思いました.
